Last time in Django: First M, T, and V we covered all the parts of our Model View Template design pattern, pointed Django to the right view, and launched our development server to see what we have created so far. We also created another app within our project folder and changed some of the files within. Now that we’ve laid the groundwork of our project it’s time to add some more templates and views, do our first refactor, create our first Model, and to delve into more of the features Django has to offer us!
A Quick Reminder:
If you’re coming back after a break don’t forget to activate your virtual environment and restart your server.
Hint: use ‘workon bmm’ for your virtualenv and ‘./manage.py runserver’.
Museum View and Template:
You might have added some more views and templates on your own after the last tutorial, but to get started we’re going to add a Museum view and template which we will be using more later.
In your views.py add the room_list function:
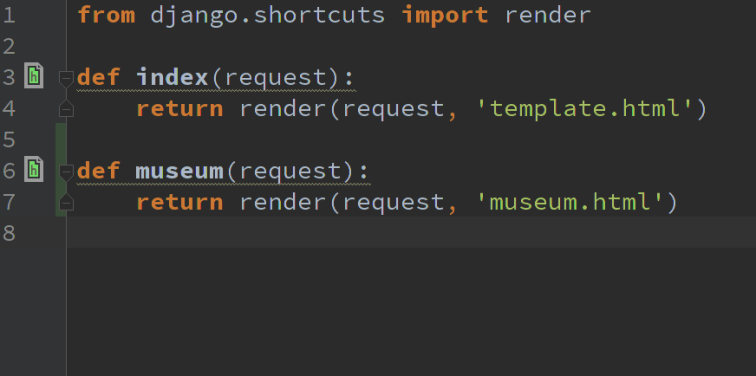
Create a room_list.html file under museum’s templates directory, changing the <title> to ‘Room List’ and the text in the <body> to ‘This page will be the room list for the British Museum Map App!’.
Now the final step as before defining the route to the Room List page in the projects urls.py file. In the urlpatterns list add the following entry:
url(r'^museum/', 'museum.views.museum', name='museum'),
Now when you visit http://127.0.0.1:8000/museum/ you will see your newly created view and template!
Refactoring Code:
As we continue to work on our project it will become necessary to ‘refactor’ our code. Refactoring is just a different way of saying we’re going to go back and clean up our code so that it remains maintainable and reusable.
Our first refactor is going to involve our projects urls. We have two apps in our project, in my case they are called bmm2 and museum. Right now all the url’s for the project are under the bmm2 app. If we ever wanted to take our museum app and reuse it in the future, it would no longer have access to it’s url information as this is currently only available in the bmm2 app. Since this could cause us diffuculty later on we are going to move the url’s related to the museum app into a urls.py file under the museum app’s directory.
First open up PyCharm (or whatever IDE/text editor you are using) and within the museum app create urls.py. Add the lines of code shown below:
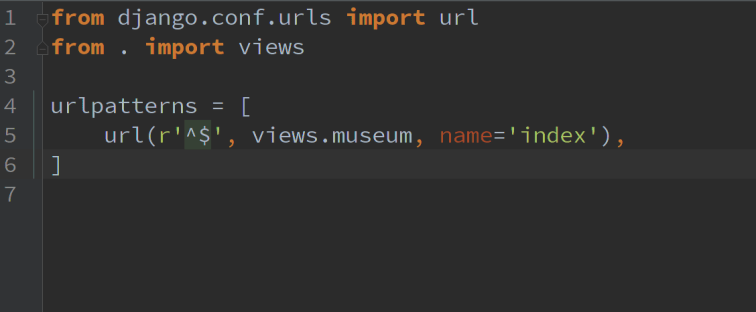
Here we are configuring our app level url patterns, which includes importing our museum view from the project views. We still need our main project to be aware of all app level url routes however, so we need to configure the bmm2 urls.py file to find all of the museum apps urls. In your bmm2 urls.py file url patterns list edit the museum url to look like the following:
url(r'^museum/', include('museum.urls'), name='museum'),
This entry imports all of the museum apps urls into the project using the Django ‘include’ module. Now if you restart your server and visit the http://127.0.0.1:8000/museum/ page you should still see the museum.html file. For now there is no index on the landing page, but that’s ok, we will come back to this later.
Don’t forget to add/commit/push your work to git/github as you go along. Frequent commits is always a good practice to maintain on any project!
Setting up the Django Admin:
We’ve done a lot with the views and templates so far, but before we move onto the behemoth that is models we should explore one of the tools Django provides us for interacting with our projects models, the Django admin.
If you were to try and visit your projects http://127.0.0.1:8000/admin page right now, you would be faced with a login page for which you have no credentials.

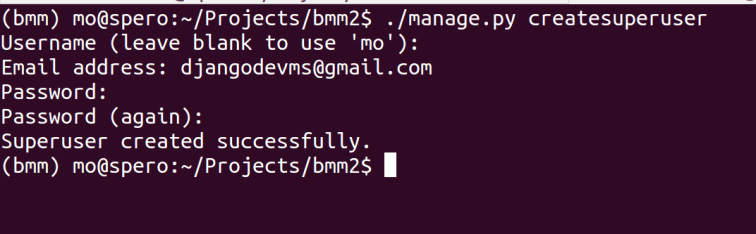
We need to create a user who has all the privileges necessary to manage our project, a super user. Once again this functionality is built directly into Django’s management commands. Before we create a superuser however you will need to have an email address handy. I recommend you create one just for your development process however you can also use an already existing email account. In your terminal enter the following command:
./manage.py createsuperuser
Enter the information you would like to use as your credentials and your terminal will look a little something like this:
Now when we visit http://127.0.0.1:8000/admin and enter our credentials we should be taken to a Site Administration page that looks like this:

You can explore the information available here, however the only entry of any note will be found under Users. You will see your Username, Email address, and Staff Status have been added to the User database. Here Staff Status equates to superuser privileges.
Now that we have the admin setup it would be nice if we had some data to actually manage. This is where things really start to get interesting. As we’ve discussed before, in Django all data is contained with Models. That User database is essentially the first model we’ve interacted with, created behind the scenes and modified by our creation of a super user.

Your First Model:
Now that you’ve created your museum app, added some views/templates, and created a super user to interact with Django’ admin it’s time to make your first model.
For the BMM project we know that we want to have a way to find and give information about the museum’s various rooms and objects when a user searched for them. Let’s start with the museum’s rooms. We know we want to create a database of the museum’s rooms and in order to do this we can use Django’s inbuilt models module.
Under the museum app open up the models.py file and enter the below text:

In Django all models are classes. Here we are creating the class Room which is a subclass inheriting from the Django Model class. Within the class Room we define the attributes all Rooms should have. Think of these as your column headers or database fields. We also define what type of information these attributes will contain, in our case character and text fields, though there are many more options.
But now that we’ve created our Room’s model how will we tell Django about it? This is where the Django Object Relational Mapping or ORM comes in.
Django ORM:
The Django ORM is basically a layer which sits on top of our database and allows us to interact with the data more easily. Particularly when it comes to the basic operations used in all sql based databases: create, read, update, delete or CRUD. The Django ORM simplifies these processes through migrations. Whenever you need to do a CRUD operation, like creating a Room database, you will need to do a migration.
In the terminal enter the following:
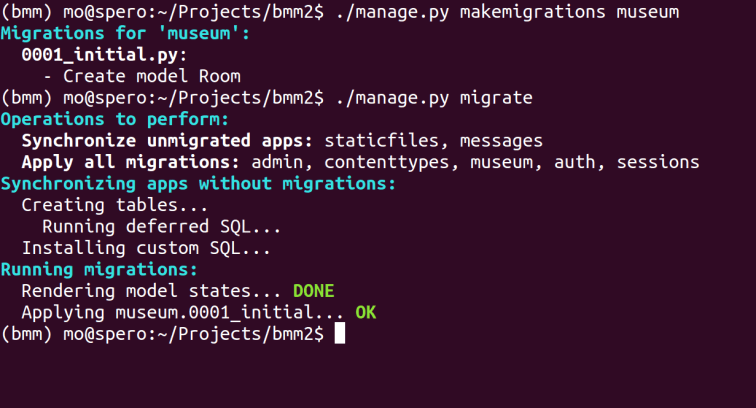
./manage.py makemigrations museum
This runs the python makemigrations command within the museum app. In the terminal you should see the creation of the python migration file that will create the Room model (database). In the museum app’s migration directory you can see this file, called 0001_intial.py. Open that file and take a look at what this migration will do. Notice the ‘CreateModel’ being called, this is how the ORM does our CRUD operations behind the scenes.
No that we’ve created the migration file we need to make sure that all migrations have been made for our project. Enter the following into the terminal:
./manage.py migrate
In the terminal you should see that our 0001_intial.py migration has been applied, it will look something like this:
The Room Model:
Now that we’ve created our first model, let’s use the Django Admin to explore it! Restart your server and return to the admin page in your browser. Once you’re logged in you will notice that you are still only seeing the Groups and Users models as before. In order to see any models you’ve created in the Django admin you will need to register the model and create an admin class to interact with it in the admin page.
Under the museum app open up the admin.py file. Here is where we register and create our admin class for our Room model. In the file enter the text as below:
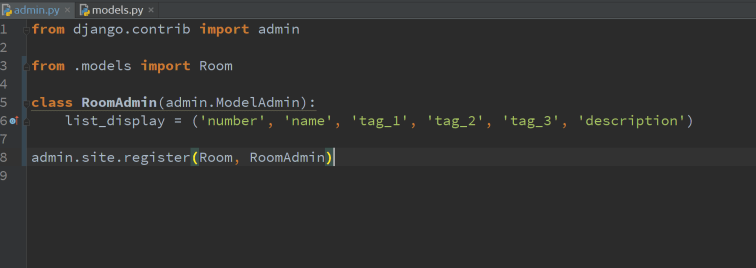
First we are importing our newly created Room model. Then we make our RoomAdmin class (a subclass inheriting from Django’s ModelAdmin) with the attribute list_display to include any of the Room model’s fields we wish to be viewable in the RoomAdmin interface. Finally we are registering both the Room and RoomAdmin class with the Django admin.
Restart your server and visit the admin page again. Voila! Your Room model has appeared under the Museum heading as ‘Rooms.’ Open this up and you will see there are currently no room’s in the database. In the top right corner you will see an option to ‘Add room +,’ select it and you will see the fields of your Room model are available to be edited.
For this next bit we are going to need a room to work with, go ahead and add a fake placeholder room here.
Now that you’ve created and explored your first model it’s time to integrate your model with your templates and views.
Room MTV Integration:
Open up the museum app views.py file. Here we can see our museum view we created earlier. We now want this view to also show how many rooms there are in the museum. To do this modify the views.py file as below:
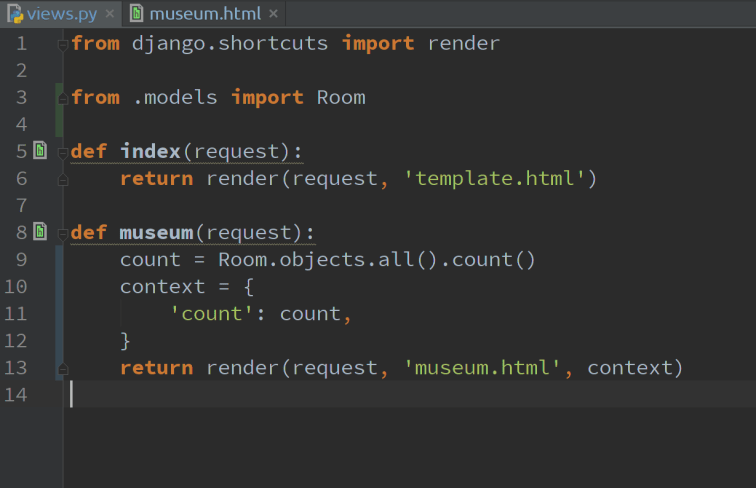
First we import our Room model for use in our museum view. We then define the count variable to be all instances of the Room model (remember this is a class so all instances of the class are its objects) and we use the count functionality to return the total number of instances of the Room class (all the rooms in our Room model/database). We then give the count variable some ‘context’ by creating the context variable and defining within a dictionary that the key ‘count’ is related to the count variable defined above. Finally in this file we add the context variable to the parameters to be returned when the museum view is rendered.
Now that we’ve collected and passed the necessary information to the the museum views rendering, we need to access the count information within the museum.html template. This is actually relatively straightforward. In the museum.html file edit the <body> text to say the following:
This is the Museum Page! Right now the Museum has {{ count }} rooms!
The double curly braces here indicates that ‘count’ is a variable, retrieved in this case from the context parameter which was included in the rendered information for the museum view.
Now that you’ve added some information about the Room model to your museum view and template you can restart the server and see if all your hard work has payed off. Visit http://127.0.0.1:8000/museum/ and you should now see this:
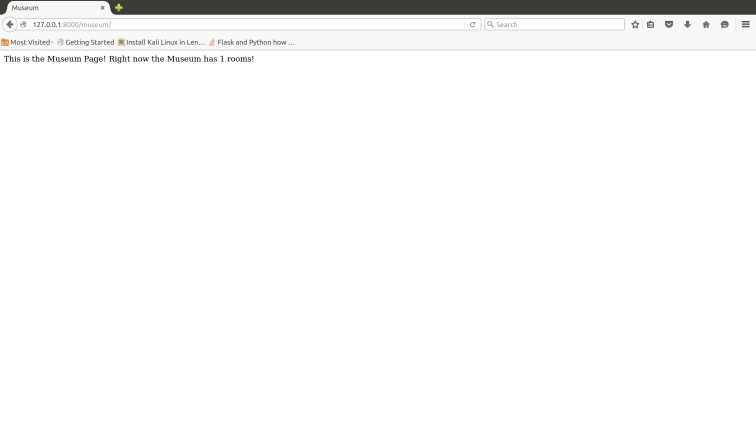
Congrats! You’ve just fully utilized the Django MTV pattern to create a Room Model, structure a museum.html Template, and render the museum View. But don’t stop there, if you go back to the admin and add another placeholder room, when you refresh the museum page you will see the ‘count’ variable has automatically updated itself to reflect the information available about your Room database.

That was a lot of work in one sitting! Don’t forget to add/commit/push any changes to git/github at this point if you haven’t been doing this as you go along.
This time and Next Time:
This time we added some more templates and views, refactored our code, explored the Django admin, and created our first Model. We also learned more about the migrations, the Django ORM, Admin classes, and how to integrate our Models into our Templates and Views.
Next time we will cover some front-end elements of our project. Particularly the use of bootstrap framework and static files to help us style the user interface of our website. Until then have fun exploring more about Django’s ORM, a good resource for this is the Django docs page: Making queries.
